1. Raw Material Selection
The process begins with the selection of high-quality aluminum. The choice of aluminum alloy depends on the specific application and desired properties of the final product. Commonly used alloys include 6061 and 7075 due to their excellent mechanical properties and corrosion resistance.
2. Cleaning Line
Before any chemical processing, the aluminum must be thoroughly cleaned to remove any contaminants that can interfere with etching.
Steps:
- Water Rinse: Use deionized (DI) water to rinse the aluminum sheets. DI water prevents impurities from affecting subsequent steps.
- Cleaning Solution: Immerse the aluminum in a cleaning solution, typically an alkaline cleaner, to remove oils, grease, and other contaminants.
- Rinse: Rinse again with DI water to remove any residues of the cleaning solution.
- Drying: Use hot air dryers to completely dry the aluminum sheets.
Water Quality Recommendation: Use deionized water with a resistivity of at least 18 MΩ·cm to ensure no ionic contamination.
3. Painting and Drying Line
After cleaning, a photoresist is applied to the aluminum surface. The photoresist will protect areas that should not be etched.
Steps:
- Application: Apply a uniform coat of liquid photoresist or dry film photoresist using a roller or spray system.
- Pre-drying: Partially dry the photoresist to remove solvents without curing it, typically in a convection oven.
- Final Drying: Cure the photoresist in a controlled environment. This usually involves a conveyorized oven with precise temperature control.
Temperature Control:
- Pre-drying: 100-120°C for 1-2 minutes.
- Final Drying: 150-180°C for 5-10 minutes, depending on the specific resist material.
4. Exposure Line
In this step, the photoresist-coated aluminum is exposed to UV light to create the desired pattern. The choice between LED and Laser Direct Imaging (LDI) exposure depends on the required precision and complexity.
LED Exposure:
- Process: The aluminum is placed in an exposure unit, and a photomask is aligned over it. UV LEDs expose the photoresist through the photomask.
- Workflow: Align photomask → Expose with UV LED → Move to developing line.
- Advantages: Cost-effective, suitable for less complex patterns.
LDI Exposure:
- Process: Directly writes the pattern onto the photoresist using a laser, eliminating the need for a photomask.
- Workflow: Program design into LDI system → Expose photoresist with laser → Move to developing line.
- Advantages: High precision, ideal for complex and high-resolution patterns.
5. Developing Line
After exposure, the photoresist needs to be developed to reveal the pattern that will be etched.
Steps:
- Developer Solution: Immerse the exposed aluminum in a developer solution, typically a diluted alkaline solution.
- Rinse: Rinse with DI water to stop the development process and remove all developer residues.
- Drying: Dry the aluminum using hot air dryers.
Why Developing is Necessary: Developing removes the exposed (or unexposed, depending on the type of resist) areas of the photoresist, creating the precise pattern needed for etching.
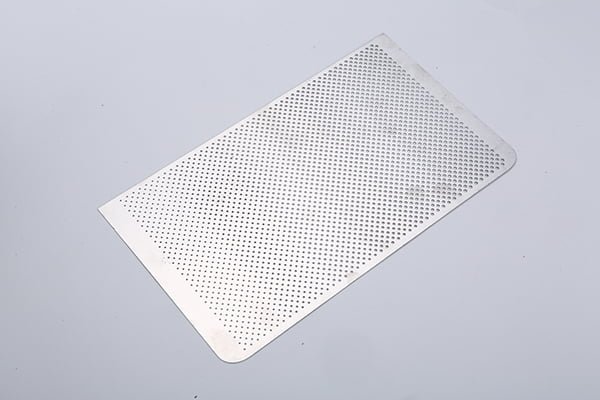
6. Aluminum Etching Line
The developed aluminum is now ready for etching, which removes the unprotected areas of the metal.
Using Copper Sulfate Etchant:
Steps:
- Etchant Preparation: Prepare a copper sulfate etchant solution. A common recipe is:
- Copper sulfate (CuSO₄): 150-200 g/L
- Sulfuric acid (H₂SO₄): 50-100 g/L
- Temperature: 45-60°C
- Etching Process: Immerse the aluminum in the etchant solution. The unprotected aluminum areas will be dissolved, leaving the desired pattern.
- Agitation: Use mild agitation to ensure even etching.
- Duration: Etching time depends on the desired depth and pattern complexity, typically 5-15 minutes.
- Rinse: Rinse thoroughly with DI water to remove etchant residues.
Parameters:
- Temperature: Maintain at 50-55°C for optimal etching speed and precision.
- Proportion: Ensure the etchant solution is regularly monitored and replenished to maintain effectiveness.
7. Stripping Line
After etching, the remaining photoresist must be stripped away to reveal the final metal pattern.
Steps:
- Stripping Solution: Use a photoresist stripper solution, often an alkaline or solvent-based solution.
- Immersion: Immerse the etched aluminum in the stripping solution until all photoresist is removed.
- Rinse: Rinse with DI water to remove any stripper residues.
- Final Drying: Dry the aluminum using hot air dryers.
Details:
- Stripper Solution Temperature: Typically 40-60°C.
- Immersion Time: 5-10 minutes, depending on the resist thickness and type.
If you need a OEM factory to realize your project, please do not hesitate to contact us.
Wet Chemical Etching Company is a leading provider of wet chemical etching services, dedicated to delivering high-quality and precise etching solutions for the semiconductor, microelectronics, and precision manufacturing industries. Equipped with advanced technology and state-of-the-art equipment, our company can handle various materials and complex pattern requirements. Our professional team has extensive experience and expertise, ensuring that every project is delivered on time and meets the highest quality standards. Whether for prototype development or large-scale production, Wet Chemical Etching Company is committed to customer satisfaction, offering customized and efficient services to help your products succeed in the market.