Chemical etching copper is a fascinating process that combines artistic creativity with scientific precision. Whether you’re a DIY enthusiast or just curious about how intricate designs are made on metal, this beginner’s guide will help you understand the process, history, materials, and techniques behind copper etching. Let’s explore how you can start your own etching projects at home and make beautiful, personalized pieces.
What is Chemical Etching?
Definition and Overview of the Process
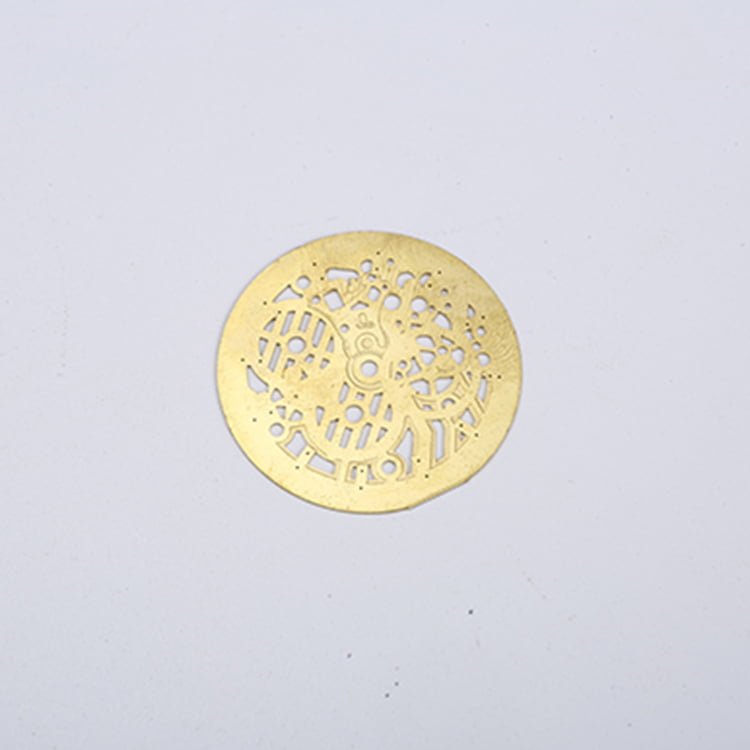
Chemical etching, also known as acid etching, is a technique used to create patterns or designs on a surface by applying a corrosive substance (usually an acid) to the metal. When applied to copper, the acid erodes the unprotected areas of the metal, leaving behind a clean, etched design. This process allows for extremely detailed and intricate designs, which makes it ideal for art, industrial applications, and custom projects.
Historical Context
The technique of chemical etching dates back to the early 16th century when William Blake, the famous British poet and artist, used it to create his illuminated books. Throughout history, artists and craftsmen have used etching to create detailed images on metal plates, and the process evolved into a significant artistic method. Today, chemical etching is still used in modern art, electronics (such as PCB etching), and even jewelry-making.
Why Copper?
Copper is a highly versatile material, making it an excellent choice for etching. Some of its key properties include:
| Property | Benefits for Etching Copper |
|---|---|
| Ductility | Copper is flexible and easy to manipulate. |
| Conductivity | Copper’s electrical properties are ideal for certain applications (e.g., PCB etching). |
| Corrosion Resistance | Copper resists corrosion, ensuring long-lasting etchings. |
| Smooth Surface | The natural smoothness of copper makes it an ideal canvas for intricate designs. |
These attributes make copper a favorite among artists, engineers, and hobbyists alike.
Materials and Tools You’ll Need
To begin copper etching at home, you will need a few essential materials and tools. Here’s a list of what you’ll need:
| Material/Tool | Purpose |
|---|---|
| Copper Sheets | The base material for your etching project. Available in various thicknesses and sizes. |
| Acid-Resistant Varnish | To protect areas of copper that you don’t want to etch. |
| Nitric Acid or Ferric Chloride | The etching solution that will erode the copper. (Note: Always follow safety instructions.) |
| Brushes | For applying varnish and ink evenly. |
| Steel Wool or Sandpaper | For cleaning the copper before applying varnish. |
| Protective Gear | Gloves, goggles, and a mask to protect from the corrosive acids. |
Safety Precautions
When working with chemicals like nitric acid, it’s crucial to prioritize safety. Always wear gloves, goggles, and a mask when handling acids. Work in a well-ventilated area, and follow all manufacturer instructions on the chemical containers. Be sure to have a neutralizing agent (such as baking soda) handy in case of spills.
You can find many of these materials on platforms like Amazon or AliExpress, where you’ll find etching kits suitable for beginners.
Step-by-Step Etching Process
Preparing the Copper Sheet
- Clean the Copper: Use steel wool or sandpaper to gently scrub the copper sheet, removing any dirt, oils, or oxidation. This ensures that the varnish will adhere properly.
- Apply Acid-Resistant Varnish: Use a brush to apply an acid-resistant varnish or resist to the copper sheet. This will protect the areas of the copper that you want to remain untouched by the acid.
- Create Your Design: If you’re working with a pre-made design, print it out in reverse and transfer it onto the varnished copper sheet. If you’re drawing by hand, make sure to work in reverse as well, as the etching process will flip the design.
The Acid Bath
- Prepare the Etching Solution: Mix your acid (either nitric acid or ferric chloride) according to the instructions provided. Ensure you’re in a well-ventilated area and using appropriate safety gear.
- Submerge the Copper Sheet: Carefully place the copper sheet in the acid bath. The acid will begin to eat away the exposed copper, creating the design you’ve applied.
- Timing: Keep a close eye on the copper as it etches. Depending on the depth of the etch and the acid used, it may take anywhere from 30 minutes to a few hours.
- Neutralize the Acid: Once you’ve achieved your desired etching depth, carefully remove the copper and neutralize the acid with baking soda or water.
Printing Your Design
Once your design is etched into the copper, it’s time to transfer it onto paper or fabric.
- Inking the Etched Plate: Apply ink to the etched copper plate using a soft, even layer. Make sure the ink gets into all the etched areas.
- Using a Press: If you have access to a printing press, use it to transfer the ink from the copper plate to your chosen material. For DIY methods, you can use a baren or even a rolling pin to apply pressure and transfer the design.
Troubleshooting Common Issues
- Ink Smudges: If the ink smears, try reducing the amount of ink you apply to the plate or let it dry a bit longer before pressing.
- Uneven Etching: If the acid didn’t etch evenly, it could be due to uneven varnish application. Ensure your resist is applied smoothly.
Creative Applications of Copper Etching
Artistic Projects
Copper etching is a fantastic way to create personalized art, from custom prints to jewelry. Artists like Rembrandt used copper etching as their preferred method for creating intricate prints, while modern artists experiment with new designs and techniques.
You can create beautiful etched artwork, or even make custom jewelry like etched pendants or bracelets. Try experimenting with different acid strengths and varnish techniques for varied results.
Practical Uses
- Circuit Boards: Copper etching is widely used in the manufacturing of printed circuit boards (PCBs) for electronics. The same process used in art can be scaled up for industrial use.
- Decorative Items: Use copper etching to create custom home decor, such as etched copper plates, coasters, or even furniture embellishments.
Inspiring Examples
Many modern artists, like David Hockney, have incorporated copper etching into their artistic processes, blending modern techniques with traditional methods.
For more inspiration and to see how artists have been using chemical etching in their work, check out this blog post on copper etching.